


Keeping food all year by lactic fermentation
Lactic fermentation, or lactic acid fermentation, is a traditional way of preserving food for the winter; a method that refines the vegetables.
It is important for a self-containing gardener to preserve the harvest for as long as possible. Patrik Ytterholm tells us more about the process and shares his recipes.
Text: Patrik Ytterholm Pictures: Patrik Ytterholm Photo: AnnVixen
Tellus Think Tank shares inspiration, ideas and good examples for a more sustainable future, read more here.
Read more articles about a sustainable future here.
Patrik Ytterholm is not only a self-containing farmer but also works as a cultivation teacher at Mora Folk School in Sweden. Patrik shares what he believes is required to run a self-containing garden with Tellus Think Tank Patrik in a separate article. In this article Patrik shares his

knowledge of preserving vegetables with the lactic fermentation method.
The term “lactic” is not really an accurate description of the lactic fermentation method as it implies that there is milk involved. The name comes from the lactobacillus which is the same bacteria that make milk sour.
A more precise term would be to only use the word “fermentation”, a process that refines vegetables with help of microorganisms.
The lactic fermentation process gives food excellent properties for storage and has been known by humankind for a long time and has also helped ensure our survival.
In some cultures lacto fermented foods are still part of most meals, to mention some foods: fermented milk products, sourdough bread and fermented beverages and of course pickled vegetables.
The basics of lactic fermentation
The foundation in lactic fermentation is to create the optimal environment for the mixture to form lactic acid. It is important to encourage microorganisms, yeasts and bacteria to thrive, and these are the main tools at hand:
- Salt Concentration (water with 0.8 -1.5 % salt)
- The right temperature (18 -22 degrees Celsius)
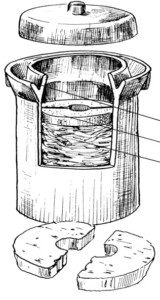
- An oxygen-free environment (a container with a tight seal that prevents air, preferably with a water trap or a preserving glass jar with a rubber gasket in the lid).
- A weight to press down on the vegetables that are to be leavened.
This is what happens in the fermentation process
The salt’s role in lactic acid fermentation is to protect the vegetables from decay in the stage of the fermentation process before the lactic acid bacteria has expanded. Salt also draws cell juice out of the vegetables. Vegetable cell juice contains sugar and, together with other substances, becomes the nutritional base for the bacteria to process the sugar into lactic acid.
Stages in the fermentation process
Fermentation process first stage – the development of bacteria.
The mixture helps develop lactic acid-, acetic acid and gas. The mixture produces so much acid that bad bacteria and butyric acid do not develop. This first phase is crucial for the success of fermentation. The fermentation process should be started quickly and not be interrupted. Temperature plays an important role.
The right temperature is important in the fermentation process:
Cucumbers ferment best at 18 -20 degrees. Carrots ferment best at 20 degrees and cabbage at 20 -22 degrees.
The first stage lasts for 2-3 days.
Fermentation process second stage – acidification.
By now the bacteria producing lactic acid are the only ones producing new bacteria. These bacteria are now eating up the bacterial mix of the first stage, which preferably is done at a slow pace. It is therefore good to lower the temperature of the fermentation (cabbage to about 15 degrees Celsius, and other vegetables to about 18 degrees Celsius).
The acidification process continues until fermentation reaches the critical pH 4.1 where no acid and no spoilage bacteria can form.
The acidification part of the process takes between 10 -14 days.
Third stage, after the completion of fermentation process.
When the fermentation process is completed the pots (or glass jars) are placed in a cold place (0- 8 degrees) such as cellar, storeroom or refrigerator.
During the full fermentation process, it is important not to open the lid of the container because the carbon dioxide developed during fermentation prevents top yeast to form.
If fermentation pots are used it should be ensured that the water groove is filled with liquid. Do not be fooled if the water seems to have disappeared, it is usually still there and can be found by moving (but not lifting) the lid slightly. If there is only a little water left; fill the pot with cooled, boiled water.
The third stage, the maturation process, takes between 2 -8 weeks, depending on the vegetables that are being fermented.
Suitable pots for lactic fermentation
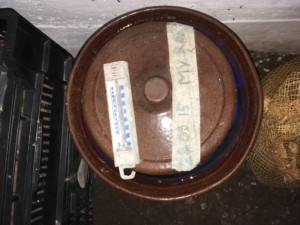
The best results, according to me, are made with water trap fermentations pots and stone.
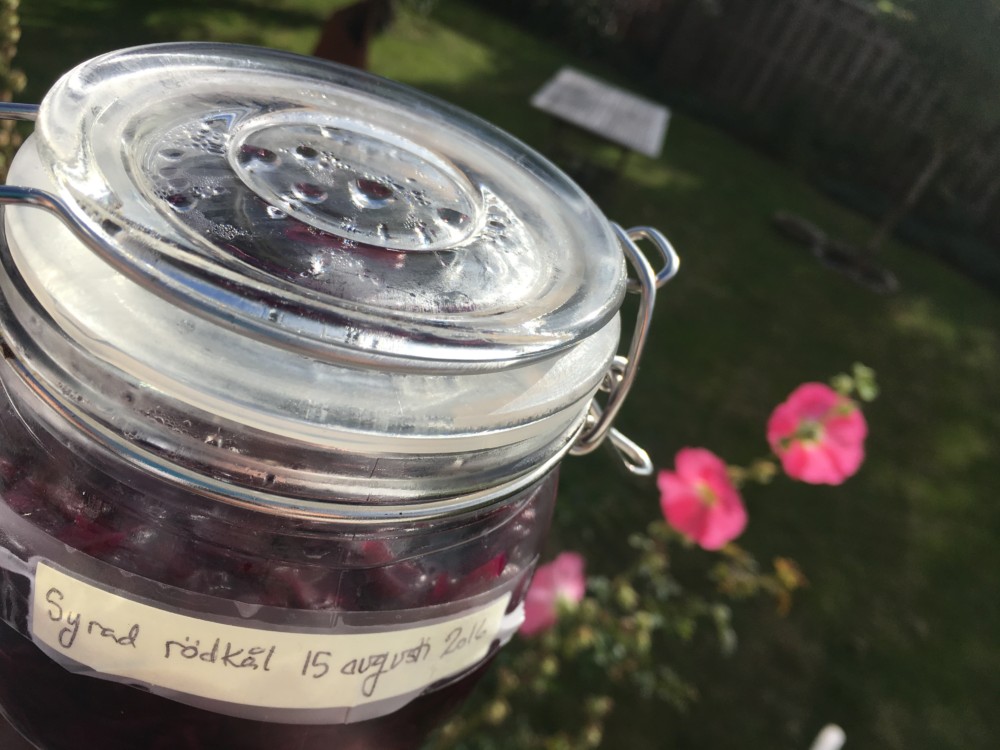
7-10 litre pots are appropriate for a smaller household, and are easy to handle. Glass jars, the old-fashioned canning glass with a rubber ring, or modern honey / jam jars with a rubber ring in the metal cap may also work well.
Hygiene
To secure a successful lactic fermentation elementary hygiene needs to be applied to both ones personal hygiene and the treatment of pots and jars.
Make sure to clean your hands and arms before you begin to work with your vegetables and pots. Hands and even arms are sometimes used to stomp vegetables.
Do not mix dirty vegetables with already rinsed vegetables.
Do not use dirty utensils, with risk of contaminating the pot.
Wash pots in hot water and only use a mild detergent on the glazed surfaces, if necessary. Never wash the unglazed surfaces with detergent and do not use antibacterial or heavily scented detergent, since they can inhibit bacterial flora and destroy the flavour.
Rinse pots thoroughly in cold water and leave them to air dry.
The weight stones are boiled in pan for 1-2 hours. Let the stones cool down before they are used to stamp the vegetables in the pot.
Sterilise glass jars by placing them in a cold oven and heating them until they have been heated and standing in 120 degrees Celsius for 20 minutes. Let the jars cool before using them.
Metal lids are cooked in a pan and left to air dry.
What can go wrong?
Bad hygiene, an uneven or wrong temperature, vegetables of poor quality, the wrong amount of salt, too badly stomped vegetables or pots that let in air are all things that can lead to failure of the fermentation process.
A general rule is that if the fermented vegetables taste good you have succeeded with the fermentation. If the fermentation process has failed you will smell foul or strong scents such as acetic acid and butyric acid.
Vegetables & quality at the lactic fermentation
The vegetable quality is important, and half rotten and not fresh vegetables should not be used in the fermentation. How the vegetables are grown are also of importance as the lactic acid bacteria requires nutrients such as sugar, vitamins, minerals and trace elements. Hard-driven and chemically sprayed vegetables do not match the needs of the lactic acid bacteria and should not be used.
Recipes for lactic fermentation of vegetables
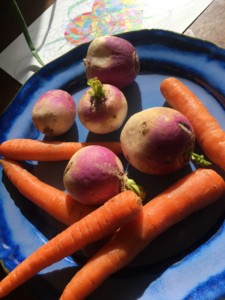
Recipe for fermenting root vegetables
For a 10-litre pot use:
- 4 kg of carrots
- 2 kg of turnips
- 6-7 normal sized onions
- 10-15 leafs of laurel
- 2 tablespoons yellow mustard seeds
- 10-15 pennies of horseradish (a horseradish cut in pennies)
- 2-3 cloves of garlic
- Dill
- 1-1.5% salt (80-120g)
Prepare the right measures of salt and spices. Peel and grate the carrot and turnip, slice the onions, peel the garlic clefts and horseradish.
For best results, carrot and turnip are to be grated and stirred and mixed with the right amount of salt. The vegetables are then stirred and stomped until they release their fluids.
Then add a layer of onions, garlic and spices.
Add a new layer with vegetables and then the onion, garlic and spices, etc.
Finish the whole mix with a layer of vegetables before the stones are laid in place. Make sure that the liquid covers the stones.
Clear the liquid from floating pieces and fragments of vegetable and clean dry the outside of the pot. Put a label on the pot with the ingredients and date of the fermentation.
Fermentation Stage 1: Place the pot in space with an even 20 degrees and put the lid on. Pour boiled, cooled water in the water groove of the pot.
Fermentation Stage 2: After 2-3 days, lower the temperature to 18 degrees, let stand for a further 7 days.
Third stage: Move the pot to an earth cellar or refrigerator. Let mature for 6-8 weeks.
Have a nice meal!
Recipe for fermentation of cabbage
If using a 10-liter pot, the following ingredients are required:
- 8 kg trimmed white cabbage
- 3 tablespoons of juniper berries
- 1 ½ tablespoons cumin
- 3-4 sour apples
- 1-1.5% salt (80-120g)
Start by putting aside a couple of large, healthy looking cabbage leaves.
Measure the salt and add all the spices.
Cut apple into pieces and mix with salt and spices.
Slice or grate the cabbage heads, the stump can also be used.
Add a little of the ingredients at a time and alternate putting in the apple/salt/spice and the cabbage in the pot / jar. Mix considerably and then stomp the vegetables so that they release their fluids.
Put the fine, large cabbage leaves as a lid on top of the vegetable mixture and then place the stones on top of the leaves.
If the liquid does not cover the stones fill the jar up with boiled, cooled water with 15 grams of salt per litre of water so that the stones are completely covered.
Fermentation Stage 1: Place the pot in a warm place 2-3 days at a temperature of 20-22 degrees Celsius.
Fermentation Stage 2: Place the pot in a cooler place, about 15 degrees, for 10-12 days. The cooler temperature makes the fermentation process continue more slowly.
Stage 3: Place the pot in an earth cellar or refrigerator at 0-8 degrees. The vegetables will be ready to eat after 4-6 weeks.
Patrik recommends the following authors for books on fermentation
Annelies Schoeneck and Inga-Britta Sundqvist.
Good luck and best regards from Patrik Ytterholm!

Find the article about Patriks self-containing garden here!
Please share this article!